

How to create Sign Up / Sign In animated duo form using HTML, CSS & JavaScript
Use HTML, CSS, and JavaScript to create a animated dual Sign up and sign in form improved user experience with modern design and a smooth user interface.
Developing a dynamic and captivating user experience is more crucial than ever in the current digital world. Using animations in web design is one approach to accomplish this. This tutorial will demonstrate how to use HTML, CSS, and JavaScript to construct an animated dual sign up and sign in form. This will not only improve your website’s general appearance and feel, but it will also make the sign in and sign up procedure easier to use.
This tutorial will cover the creation of a dual sign in/sign up form using HTML, CSS, and JavaScript. Initially, HTML will be used to establish the form’s structure and CSS for styling and animations. Following that, JavaScript will be introduced to enhance interactivity, such as toggling between sections and validating the form.
- HTML CODE
To begin, we will first need to set up a fundamental HTML document. Within this document, we will establish the primary work for our Sign In/Sign up interface.
In the head section, we will include the title of the webpage along with meta tags to define the character encoding and viewport settings. Additionally, it will contain links to external CSS stylesheets, such as Bootstrap and Font Awesome, which are utilized for styling purposes and for incorporating icons into the form.
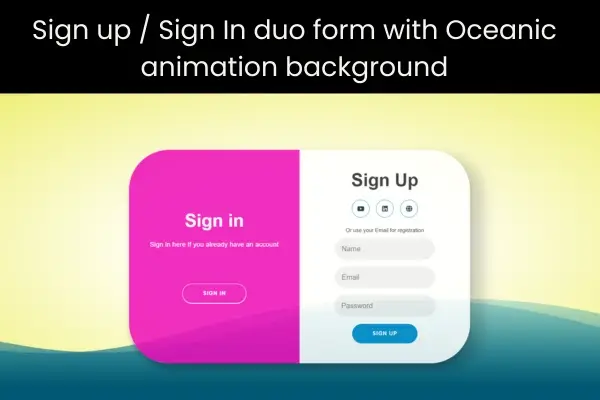
In the body section, we kick off with a background animation depicting ocean waves, followed by the arrangement of the form, which separated into two parts: one for signing in and other for signing up. The form is enclosed with a container div and styled using CSS classes and Bootstrap. Social media icons are also featured in the form, implemented through Font Awesome.
The code leverages the Bootstrap and Font Awesome libraries to create a form with a responsive design and to incorporate icons.
The form is split into two segments, one for sign in and another for sign up, and includes social media icons along with some basic validation. Additionally, there is an ocean wave animation in the background.
Once the files are setup, simply insert the following code into your document. Ensure that your HTML file is saved with a .html extension for proper viewing in the web browser.
<!DOCTYPE html>
<html lang="en">
  <head>
    <title>Marvelous Login / Signup Form</title>
    <meta charset="UTF-8" />
    <meta name="viewport" content="width=device-width" />
    <link rel='stylesheet' href='https://cdnjs.cloudflare.com/ajax/libs/bootstrap/5.0.2/css/bootstrap.min.css'>
    <link rel='stylesheet' href='https://cdnjs.cloudflare.com/ajax/libs/font-awesome/6.2.1/css/all.min.css'>
    <link rel="stylesheet" href="styles.css" />
  </head>
  <body>
    <div class="ocean">
      <div class="wave"></div>
      <div class="wave"></div>
  </div>
  <!-- Sign In Form Section -->
  <section>
      <div class="container" id="container">
          <div class="form-container sign-up-container">
              <form action="#">
                  <h1>Sign Up</h1>
                  <div class="social-container">
                      <a href="https://www.youtube.com/@CodingJasim/videos" target="_blank" class="social"><i class="fa-brands fa-youtube"></i></a>
                      <a href="https://www.linkedin.com/in/r-mohammed-jaseem-9b73203a2/recent-activity/all/" target="_blank" class="social"><i class="fa-brands fa-linkedin"></i></a>
                      <a href="https://codingjasimweb.com/" target="_blank" class="social"><i class="fa-solid fa-globe"></i></a>
                  </div>
                  <span>Or use your Email for registration</span>
                  <label>
                      <input type="text" placeholder="Name"/>
                  </label>
                  <label>
                      <input type="email" placeholder="Email"/>
                  </label>
                  <label>
                      <input type="password" placeholder="Password"/>
                  </label>
                  <button style="margin-top: 9px">Sign Up</button>
              </form>
          </div>
          <div class="form-container sign-in-container">
              <form action="#">
                  <h1>Sign in</h1>
                  <div class="social-container">
                      <a href="https://www.youtube.com/@CodingJasim/videos" target="_blank" class="social"><i class="fa-brands fa-youtube"></i></a>
                      <a href="https://www.linkedin.com/in/r-mohammed-jaseem-9b73203a2/recent-activity/all/" target="_blank" class="social"><i class="fa-brands fa-linkedin"></i></a>
                      <a href="https://codingjasimweb.com/" target="_blank" class="social"><i class="fa-solid fa-globe"></i></a>
                  </div>
                  <span> Or sign in using E-Mail Address</span>
                  <label>
                      <input type="email" placeholder="Email"/>
                  </label>
                  <label>
                      <input type="password" placeholder="Password"/>
                  </label>
                  <a href="#">Forgot your password?</a>
                  <button>Sign In</button>
              </form>
          </div>
          <div class="overlay-container">
              <div class="overlay">
                  <div class="overlay-panel overlay-left">
                      <h1>Sign in</h1>
                      <p>Sign in here if you already have an account </p>
                      <button class="ghost mt-5" id="signIn">Sign In</button>
                  </div>
                  <div class="overlay-panel overlay-right">
                      <h1>Create, Account!</h1>
                      <p>Sign up if you still don't have an account ... </p>
                      <button class="ghost" id="signUp">Sign Up</button>
                  </div>
              </div>
          </div>
      </div>
  </section>
  <script src='https://cdnjs.cloudflare.com/ajax/libs/bootstrap/5.2.3/js/bootstrap.min.js'></script>
    <script src="script.js"></script>
  </body>
</html>- CSS CODE
After establishing the fundamental HTML framework for the sign in / sign up forms, the subsequent step involves applying styling to these forms with CSS. CSS enables us to manipulate the aesthetic aspects of the website, covering elements like layout, color schemes, and font styles.
In this document, we will implement some straightforward CSS rules to design our forms. Additionally, we will incorporate padding and margin properties to ensure a visually pleasing arrangement. The CSS is utilized to define width, height, and display characteristics of the container div that encloses the form. It also configures the justify-content and align-items properties to centre the form within the page.
Furthermore, it defines styles for the input fields, including font size, padding, and border-radius, along with styling for the form labels, buttons, and social media icons.
It additionally employs CSS animations to introduce motion and aesthetic charm to the form, like switching between the sign in and signup areas. It also utilized CSS to enhance the background ocean animation.
Generate a CSS file titles styles.css and insert the provided code into your CSS file. Keep in mind that you need to create a file with the .css extension.
html, body {
  width: 100%;
  height: 100%;
}
body {
  /*background:radial-gradient(ellipse at center, rgba(255,254,234,1) 0%, rgba(255,254,234,1) 35%, #B7E8EB 100%);*/
  background:radial-gradient(ellipse at center, rgba(255, 254, 234,1) 0%, rgba(255, 254, 234,1) 35%, #eeee6f 100%);
  overflow: hidden;
}

.ocean {
  height: 5%;
  width:100%;
  position:absolute;
  bottom:0;
  left:0;
  /*background: #015871;*/
  background: #015873;
}

.wave {
  background: url(https://s3-us-west-2.amazonaws.com/s.cdpn.io/85486/wave.svg) repeat-x;
  position: absolute;
  top: -198px;
  width: 6400px;
  height: 198px;
  animation: wave 5s cubic-bezier( 0.36, 0.45, 0.63, 0.53) infinite;
  transform: translate3d(0, 0, 0);
}

.wave:nth-of-type(2) {
  top: -175px;
  animation: wave 7s cubic-bezier( 0.36, 0.45, 0.63, 0.53) -.125s infinite, swell 7s ease -1.25s infinite;
  opacity: 1;
}

@keyframes wave {
  0% {
      margin-left: 0;
  }
  100% {
      margin-left: -1600px;
  }
}

@keyframes swell {
  0%, 100% {
      transform: translate3d(0,-25px,0);
  }
  50% {
      transform: translate3d(0,5px,0);
  }
}

/* Login Section Style */
* {
  box-sizing: border-box;
}

body {
  font-family: 'Montserrat', sans-serif;
  display: flex;
  flex-direction: column;
  justify-content: center;
  align-items: center;
  height: 100vh;
  margin: -20px 0 50px;
  margin-top: 20px;
}

h1 {
  font-weight: bold;
  margin: 0;
}

p {
  font-size: 14px;
  font-weight: 100;
  line-height: 20px;
  letter-spacing: .5px;
  margin: 20px 0 30px;
}

span {
  font-size: 12px;
}

a {
  color: #0e263d;
  font-size: 14px;
  text-decoration: none;
  margin: 15px 0;
}

.container {
  background: #fff;

  border-radius: 90px;
  box-shadow: 30px 14px 28px rgba(0, 0, 5, .2), 0 10px 10px rgba(0, 0, 0, .2);
  position: relative;
  overflow: hidden;
  opacity: 85%;
  width: 768px;
  max-width: 100%;
  min-height: 480px;
  transition: 333ms;
}


.form-container form {
  background: #fff;
  display: flex;
  flex-direction: column;
  padding:  0 50px;
  height: 100%;
  justify-content: center;
  align-items: center;
  text-align: center;
}

.social-container {
  margin: 20px 0;
  display: block;
}


.social-container a {
  border: 1px solid #008ecf;
  border-radius: 50%;
  display: inline-flex;
  justify-content: center;
  align-items: center;
  margin: 0 5px;
  height: 40px;
  width: 40px;
  transition: 333ms;
}
.social-container a:hover {
  transform: rotateZ(13deg);
  border: 1px solid #0e263d;
}

.form-container input {
  background: #eee;
  border: none;
  border-radius: 50px;
  padding: 12px 15px;
  margin: 8px 0;
  width: 100%;
}
.form-container input:hover {
  transform: scale(101%);
}

button {
  border-radius: 50px;
  box-shadow: 0 1px 1px ;
  border: 1px solid #008ecf;
  background: #008ecf;
  color: #fff;
  font-size: 12px;
  font-weight: bold;
  padding: 12px 45px;
  letter-spacing: 1px;
  text-transform: uppercase;
  transition: transform 80ms ease-in;
}

button:active {
  transform: scale(.95);
}

button:focus {
  outline: none;
}

button.ghost {
  background: transparent;
  border-color: #fff;
}

.form-container {
  position: absolute;
  top: 0;
  height: 100%;
  transition: all .6s ease-in-out;
}

.sign-in-container {
  left: 0;
  width: 50%;
  z-index: 2;
}

.sign-up-container {
  left: 0;
  width: 50%;
  z-index: 1;
  opacity: 0;
}

.overlay-container {
  position: absolute;
  top: 0;
  left: 50%;
  width: 50%;
  height: 100%;
  overflow: hidden;
  transition: transform .6s ease-in-out;
  z-index: 100;
}

.overlay {
  background: #ff416c;
  background: rgb(238, 11, 185);
  color: #fff;
  position: relative;
  left: -100%;
  height: 100%;
  width: 200%;
  transform: translateY(0);
  transition: transform .6s ease-in-out;
}

.overlay-panel {
  position: absolute;
  top: 0;
  display: flex;
  flex-direction: column;
  justify-content: center;
  align-items: center;
  padding: 0 40px;
  height: 100%;
  width: 50%;
  text-align: center;
  transform: translateY(0);
  transition: transform .6s ease-in-out;
}

.overlay-right {
  right: 0;
  transform: translateY(0);
}

.overlay-left {
  transform: translateY(-20%);
}

/* Move signin to right */
.container.right-panel-active .sign-in-container {
  transform: translateY(100%);
}

/* Move overlay to left */
.container.right-panel-active .overlay-container {
  transform: translateX(-100%);
}

/* Bring signup over signin */
.container.right-panel-active .sign-up-container {
  transform: translateX(100%);
  opacity: 1;
  z-index: 5;
}

/* Move overlay back to right */
.container.right-panel-active .overlay {
  transform: translateX(50%);
}

/* Bring the text back to center */
.container.right-panel-active .overlay-left {
  transform: translateY(0);
}

/* Same effect for right */
.container.right-panel-active .overlay-right {
  transform: translateY(20%);
}- JavaScript
The final phase in developing an animated dual sign in / sign up interface utilizing HTML, CSS, and JavaScript involves incorporating interactivity into the site through JavaScript. JavaScript enables us to build dynamic and engaging components on the site, including forms, image sliders, and modals.
To enable the script to execute on the page, create a JavaScript file called script.js and the given code to it. In order for the scripts to execute on the page, make sure it is properly connected to your HTML document. Remember that a file with a .js extension must be created.
const btnSignUp = document.getElementById('signUp');
const btnSignIn = document.getElementById('signIn');
const container = document.getElementById('container');

btnSignUp.addEventListener('click', () =>
    container.classList.add('right-panel-active'));

btnSignIn.addEventListener('click', () =>
    container.classList.remove('right-panel-active'));
Conclusion & Final Thoughts
In conclusion, careful consideration of a number of factors, including design, interaction, and accessibility, is necessary to create an animated dual sign in/sign up form that offers a great user experience. We can design a form that not only serves its practical global but also pleases users by adhering to best practices and adding animations and interaction. It’s crucial to consider accessibility and make sure that everyone can use our form. An attractive sign in/sign up form may make our website stand out and significantly improve the user experience.