


Learn How to create interactive Calendar with HTML, CSS, and JavaScript
Unleash the potential of HTML, CSS, and JavaScript by developing an engaging calendar for you web application. Understand how to incorporate events and switch between month.
Building an interactive calendar with HTML, CSS, and JavaScript can serve as a valuable assets for developers aiming to improve the functionality and user experience of their web projects. Whether you are designing a scheduling tool for personal use or for a business, an interactive calendar is an essential feature that will allow you users to book appointments, organize events, and manage their time more effectively.
In this article, we will offer a detailed guide on how to create an interactive calendar using HTML, CSS, and JavaScript. We will explore the fundamentals of HTML and CSS, the basics of JavaScript, and then demonstrate how merge these three technologies to develop a fully operational interactive calendar.
- HTML CODE
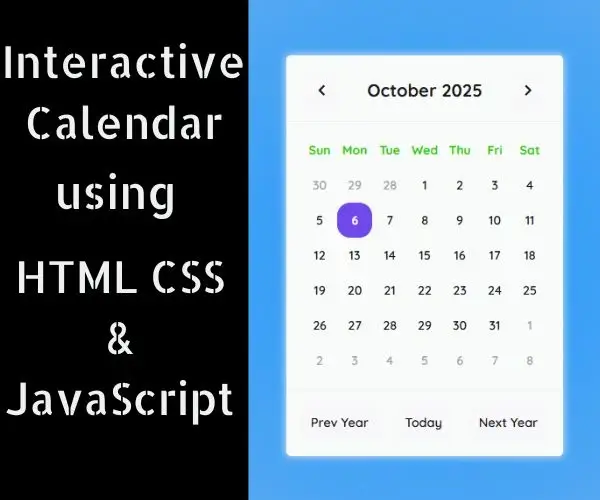
To begin, we will need to establish a basic HTML framework for our calendar. This should encompass a container element to hold the calendar, along with elements for each day of the week and for the date.
Once files have been created, simply paste the following code into your file. Ensure you save your HTML document .html extension to allow for proper viewing in a web browser.
<!DOCTYPE html>
<html lang="en">
  <head>
    <title>Interactive Calendar with Vanilla JavaScript | Coding Jasim</title>
    <meta charset="UTF-8" />
    <meta name="viewport" content="width=device-width" />
    <link rel="stylesheet" href="styles.css" />
  </head>
  <body>
    <link href="https://cdnjs.cloudflare.com/ajax/libs/font-awesome/5.13.0/css/all.min.css" rel="stylesheet"/>
    <div class="calendarCard">
      <div class="toolbar-calendar">
        <button class="prev month-btn">
          <i class="fas fa-chevron-left"></i>
        </button>
        <div class="current-month"></div>
        <button class="next month-btn">
          <i class="fas fa-chevron-right"></i>
        </button>
      </div>
      <div class="calendar">
        <div class="weekdays">
          <div class="weekday-name">Sun</div>
          <div class="weekday-name">Mon</div>
          <div class="weekday-name">Tue</div>
          <div class="weekday-name">Wed</div>
          <div class="weekday-name">Thu</div>
          <div class="weekday-name">Fri</div>
          <div class="weekday-name">Sat</div>
        </div>
        <div class="calendar-days"></div>
      </div>
      <div class="goto-buttons">
        <button type="button" class="btn prev-year">Prev Year</button>
        <button type="button" class="btn today">Today</button>
        <button type="button" class="btn next-year">Next Year</button>
      </div>
    </div>
	<script src="script.js"></script>
  </body>
</html>- CSS CODE
Once the fundamental HTML structure of the calendar is established. The subsequent step involves applying styles to the calendar using CSS. CSS enables us to dictate the visual aesthetic of the website, including aspects such as typography, color, and layout.
We will then produce our CSS file. To create our calendar, we will apply a few fundamental CSS rules in this file. To make sure everything looks right, we’ll also use padding and margin attributes.
This will improve how our calendar is presented. Make a CSS file called styles.css, then insert the given code into it. Don’t forget to use the .css extension when saving this file.
@import url("https://fonts.googleapis.com/css2?family=Quicksand:wght@400;500;600;700&display=swap");

* {
  margin: 0;
  padding: 0;
}

body {
  height: 100vh;
  background: rgb(92, 53, 200);
  background: radial-gradient(circle, rgb(29, 151, 251) 0%, rgba(148,187,233,1) 100%);
  display: flex;
  justify-content: center;
  align-items: center;
  font-family: "Quicksand", sans-serif;
  user-select: none;
}

.calendarCard {
  width: 316px;
  height: fit-content;
  background-color: #f9fafa;
  border-radius: 5px;
  box-shadow: 0px 0px 10px #efefef;
}

.toolbar-calendar {
  display: flex;
  justify-content: space-between;
  align-items: center;
  padding: 20px;
  padding-bottom: 15px;
  border-bottom: 1px solid #efefef;
}

.toolbar-calendar > .current-month {
  font-size: 20px;
  font-weight: bold;
  color: #19181a;
}

.toolbar-calendar > [class$="month-btn"] {
  width: 40px;
  aspect-ratio: 1;
  text-align: center;
  line-height: 40px;
  font-size: 14px;
  color: #19181a;
  background: #f8f7fa;

  border: none;
  border-radius: 15px;
}

.weekdays,
.calendar-days {
  display: flex;
  flex-wrap: wrap;
  padding-inline: 18px;
}
.weekdays {
  padding-top: 12px;

}
.calendar-days {
  padding-bottom: 12px;
}

.weekday-name,
[class$="-day"] {
  width: 40px;
  height: 40px;
  color: #19181a;
  text-align: center;
  line-height: 40px;
  font-weight: 600;
  font-size: 14px;
}

.weekday-name {
  color: rgb(41, 205, 9);
  font-weight: 700;
}

.current-day {
  background-color: rgb(112, 71, 235);
  color: #f8f7fa;
  border-radius: 15px;
  font-weight: 700;
  transition: 0.5s;
  cursor: pointer;
}

.padding-day {
  color: #a5a5a5;
  user-select: none;
}

.toolbar-calendar > [class$="month-btn"]:hover,
.month-day:hover,
.btn:hover {
  border-radius: 15px;
  background-color: #f8f7fa;
  color: rgb(112, 71, 235);
  transition: 0.1s;
  cursor: pointer;
  box-shadow: inset 0px 0px 0px 1.5px rgb(112, 71, 235);
}

.toolbar-calendar > [class$="month-btn"]:focus,
.month-day:focus,
.btn:focus {
  border-radius: 15px;
  background-color: rgb(112, 71, 235);
  color: #f8f7fa;
}

.goto-buttons {
  border-top: 1px solid #efefef;
  padding-block: 18px;
  display: flex;
  justify-content: space-evenly;
}

.btn {
  background: #f8f7fa;
  border: none;
  border-radius: 15px;
  padding: 11px 13px;
  color: #19181a;
  font-family: "Quicksand", sans-serif;
  font-weight: 600;
  font-size: 0.9rem;
  margin-right: 1px;
  box-shadow: 0px 0px 0px #efefef;
}- JavaScript
Adding interaction to the calendar using JavaScript is the last stage in making a interactive calendar with HTML, CSS, and JavaScript.
We are giving customers an interesting and dynamic experience by incorporating JavaScript interaction into the calendar, which improves its use and appeal. Utilize JavaScript to modify the calendar’s content in response to user input.
In order for the scripts to run on the page, create a JavaScript file called script.js, put the provided codes into it, and ensure that it is correctly connected to your HTML template. Keep in mind that you must create a file with the .js extension.
let currentMonth = document.querySelector(".current-month");
let calendarDays = document.querySelector(".calendar-days");
let today = new Date();
let date = new Date();


currentMonth.textContent = date.toLocaleDateString("en-US", {month:'long', year:'numeric'});
today.setHours(0,0,0,0);
renderCalendar();

function renderCalendar(){
    const prevLastDay = new Date(date.getFullYear(),date.getMonth(),0).getDate();
    const totalMonthDay = new Date(date.getFullYear(),date.getMonth()+1,0).getDate();
    const startWeekDay = new Date(date.getFullYear(),date.getMonth(),0).getDay();

    calendarDays.innerHTML = "";

    let totalCalendarDay = 6 * 7;
    for (let i = 0; i < totalCalendarDay; i++) {
        let day = i-startWeekDay;

        if(i <= startWeekDay){
            // adding previous month days
            calendarDays.innerHTML += `<div class='padding-day'>${prevLastDay-i}</div>`;
        }else if(i <= startWeekDay+totalMonthDay){
            // adding this month days
            date.setDate(day);
            date.setHours(0,0,0,0);

            let dayClass = date.getTime()===today.getTime() ? 'current-day' : 'month-day';
            calendarDays.innerHTML += `<div class='${dayClass}'>${day}</div>`;
        }else{
            // adding next month days
            calendarDays.innerHTML += `<div class='padding-day'>${day-totalMonthDay}</div>`;
        }
    }
}

document.querySelectorAll(".month-btn").forEach(function (element) {
	element.addEventListener("click", function () {
		date = new Date(currentMonth.textContent);
        date.setMonth(date.getMonth() + (element.classList.contains("prev") ? -1 : 1));
		currentMonth.textContent = date.toLocaleDateString("en-US", {month:'long', year:'numeric'});
		renderCalendar();
	});
});

document.querySelectorAll(".btn").forEach(function (element) {
	element.addEventListener("click", function () {
        let btnClass = element.classList;
        date = new Date(currentMonth.textContent);
        if(btnClass.contains("today"))
            date = new Date();
        else if(btnClass.contains("prev-year"))
            date = new Date(date.getFullYear()-1, 0, 1);
        else
            date = new Date(date.getFullYear()+1, 0, 1);

		currentMonth.textContent = date.toLocaleDateString("en-US", {month:'long', year:'numeric'});
		renderCalendar();
	});
});
Conclusion & Final Thoughts
In conclusion, for developers wishing to improve the functionality and user experience of their web projects, creating a interactive calendar using HTML, CSS, and JavaScript can both a challenging and rewarding task. You can make a interactive calendar that is both aesthetically pleasing and incredibly functional by following the instruction and advice in this article, giving all of your users the best possible experience.