

Discover how to build a simple basic calculator from the ground up using HTML & CSS in this comprehensive guide. Ideal for those new to web development!
As a newcomer to web development, one engaging project you can embark on is crafting a straightforward calculator. This endeavor will not only enhance your grasp of fundamental HTML and CSS concepts, but it will also provide you with valuable insights into incorporating functionality into a user a user interface through JavaScript.
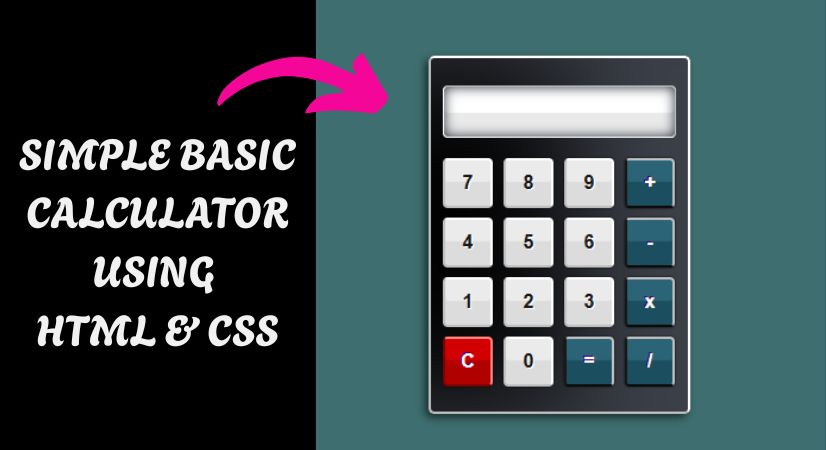
For everyone a calculator is an essential tool, even if you already know how to perform addition, subtraction, multiplication, and division. It streamlines you work when tackling simple arithmetic. An HTML calculator is designed to execute basic mathematical functions like addition, subtraction, multiplication, and division. In this tutorial, we will walk through the steps to create a calculator from scratch utilizing HTML and CSS.
Before diving into this tutorial, it’s important to have a fundamental knowledge of HTML and CSS. Additionally you’ll need a code editor like Visual Studio Code or Sublime Text to write and store your code.
Let's get started on constructing this simple basic calculator step by step using HTML and CSS
- Step 1 : Make a new folder. Feel free to name it whatever you prefer, and then add the files listed below inside it.
- Step 2 : Create an index.html file. Confirm that the file name index and the extension is .html.
- Step 3 : Set up a styles.css file. The file name should be styles and must have the .css extension
Step 1 : HTML Code
To begin, we need to set up a fundamental HTML file. Within this file, we will outline the primary framework for the calculator.
We’ll initiate the the process by constructing a div element and assigning it the class of “container“. This div will serve as the main section of our calculator. Following that, we will incorporate buttons and an input field into the calculator. The button element will be utilized to create buttons, while the input element will be used for the input field.
Once files are generated, simply insert the following code into your file. Ensure that you save your HTML document with a .html extension, so it can be correctly displayed in a web browser.
This represents the essential framework of our calculator using HTML, and we can now proceed to style it using CSS.
<!DOCTYPE html>
<html lang="en">
  <head>
    <title>Simple Calculator | Coding Jasim</title>
    <meta charset="UTF-8" />
    <meta name="viewport" content="width=device-width" />
    <link rel="stylesheet" href="styles.css" />
  </head>
  <body>
  <div class="container">
	<fieldset id="section">
		<form name="calculator">

			<input id="display" type="text" name="display" readonly>

			<input class="button digits" type="button" value="7" onclick="calculator.display.value += '7'">
			<input class="button digits" type="button" value="8" onclick="calculator.display.value += '8'">
			<input class="button digits" type="button" value="9" onclick="calculator.display.value += '9'">
			<input class="button mathButtons" type="button" value="+" onclick="calculator.display.value += ' + '">
			<br>
			<input class="button digits" type="button" value="4" onclick="calculator.display.value += '4'">
			<input class="button digits" type="button" value="5" onclick="calculator.display.value += '5'">
			<input class="button digits" type="button" value="6" onclick="calculator.display.value += '6'">
			<input class="button mathButtons" type="button" value="-" onclick="calculator.display.value += ' - '">
			<br>
			<input class="button digits" type="button" value="1" onclick="calculator.display.value += '1'">
			<input class="button digits" type="button" value="2" onclick="calculator.display.value += '2'">
			<input class="button digits" type="button" value="3" onclick="calculator.display.value += '3'">
			<input class="button mathButtons" type="button" value="x" onclick="calculator.display.value += ' * '">
			<br>
			<input id="clearButton" class="button" type="button" value="C" onclick="calculator.display.value = ''">
			<input class="button digits" type="button" value="0" onclick="calculator.display.value += '0'">
			<input class="button mathButtons" type="button" value="=" onclick="calculator.display.value = eval(calculator.display.value)">
			<input class="button mathButtons" type="button" value="/" onclick="calculator.display.value += ' / '">
		</form>
	</fieldset>
</div>
  </body>
</html>
Step 2 : CSS Code
After establishing the fundamental HTML framework for the calculator, the subsequent step is to incorporate styling through CSS. CSS enables us to manage the aesthetic aspects of the website, including elements such as layout, color schemes, and typography. Which will enhance the appearance of our calculator.
Create a CSS file named styles.css and insert the provided code into this file. Ensure that you save it with a .css file extension.
body {
	background-color: #3e6e6f;
	font-family: Tahoma;
}

.container {
	display: flex;
	align-items: center;
	height: 100vh;
	width: 100vw;
	justify-content: center;
}

#section {
	width: 200px;
	padding: 8px 8px 15px 8px;
	margin: 20px auto;
	background-color: black;
	border-radius: 5px;
	border-top: 2px solid #FFF;
	border-right: 2px solid #FFF;
	border-bottom: 2px solid #C1C1C1;
	border-left: 2px solid #C1C1C1;
	box-shadow: -3px 3px 7px rgba(0, 0, 0, .6), inset -100px 0px 100px rgba(124, 131, 150, 0.5);
}

#display {
	display: block;
	margin: 15px auto;
	height: 42px;
	width: 174px;
	padding: 0 10px;
	font-size: 28px;
	color: #242020;
	text-align: right;
	font-weight: 400;
	border-radius: 4px;
	border-top: 1px solid #C1C1C1;
	border-right: 1px solid #C1C1C1;
	border-bottom: 1px solid #FFF;
	border-left: 1px solid #FFF;
	background-color: #FFF;
	box-shadow: inset 0px 0px 10px #232c37, inset 0px -20px 1px rgba(150, 150, 150, .2);
}

.button {
	display: inline-block;
	font-size: 16px;
	font-weight: bold;
	border-radius: 4px;
	margin: 2px;
	width: 42px;
	height: 42px;
}

.mathButtons {
	margin: 2px 2px 6px 2px;
	color: #FFF;
	text-shadow: -1px -1px 0px #44006F;
	background-color: #2b6477;
	border-top: 2px solid #C1C1C1;
	border-right: 2px solid #C1C1C1;
	border-bottom: 2px solid #0c0b0b;
	border-left: 2px solid #181818;
	box-shadow: 0px 0px 2px #030303, inset 0px -20px 1px #1b4e5f;
}

.digits {
	color: #181818;
	text-shadow: 1px 1px 0px #FFF;
	background-color: #EBEBEB;
	border-top: 2px solid #FFF;
	border-right: 2px solid #FFF;
	border-bottom: 2px solid #C1C1C1;
	border-left: 2px solid #C1C1C1;
	border-radius: 4px;
	box-shadow: 0px 0px 2px #030303, inset 0px -20px 1px #DCDCDC;
}

.digits:hover,
.mathButtons:hover,
#clearButton:hover {
	background-color: #425bfd;
	box-shadow: 0px 0px 2px #425bfd, inset 0px -20px 1px #455ae5;
	border-top: 2px solid #3d6abc;
	border-right: 2px solid #FFF;
	border-bottom: 2px solid #131a48;
	border-left: 2px solid #131a48;
}

#clearButton {
	color: #FFF;
	text-shadow: -1px -1px 0px #44006F;
	box-shadow: 0px 0px 2px #030303, inset 0px -20px 1px #B00000;
	background-color: #D20000;
	border-top: 2px solid #FF8484;
	border-right: 2px solid #FF8484;
	border-bottom: 2px solid #800000;
	border-left: 2px solid #800000;
}
Conclusion
Developing a calculator is an excellent introduction to web development, as it allows you to practice utilizing HTML & CSS within a straightforward project. By adhering to the directions provided in this guide, you can create your own calculator and modify it according to your preferences. Whether you are a beginner or a experienced developer, crafting a calculator is an enjoyable and fulfilling project that can enhance your web development expertise.
Through this guide, we have walked through the steps of building a simple basic calculator using HTML & CSS. We began by constructing the HTML layout and adding buttons alongside an input field. Next, we applied CSS to style the calculator, providing it with a simple design, font choice, background color, and hover effects.
In summary, constructing a calculator from the ground up may appear challenging at first, but by dividing it into smaller, achievable task, you can simplify the process significantly. Feel free to explore and adjust your calculator until it aligns with your requirements.
We are waiting for complete article..