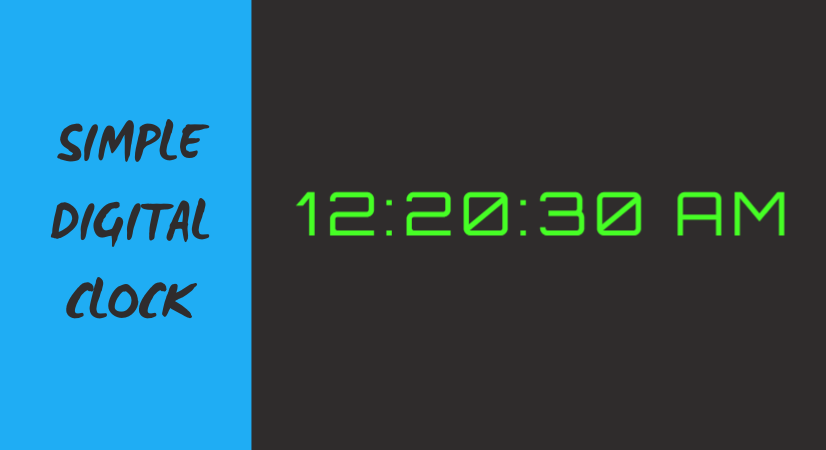
Making Use of HTML, CSS, and JavaScript to create a simple digital clock. This detailed tutorial will assist you in comprehending the fundamentals of web development.

Welcome to our lesson on combing HTML, CSS, and JavaScript to create a digital clock. We’ll walk you through the process of making a working clock that you can incorporate into your online projects, in this comprehensive guide. This tutorial is ideal for any one who wants to learn more about web development or who is just starting out.
Clocks are not only useful in the current digital era, but they also significantly improve the user experience on websites and applications. By including a digital clock, you may give your user access to real-time information. such as countdown, the current time, events connected to time.
Creating a digital clock with HTML, CSS, and JavaScript is an excellent method to grasp the basics of web development. HTML (Hypertext Markup Language) offers the frame work and content, CSS (Cascading Style Sheets) enables us to design and personalize the clock look, while JavaScript introduces interactivity and features.
You will have a completely working digital clock at the end of this lesson, which you may modify and include into your website or even use as a foundation for more advanced applications. So, let’s get started and use HTML, CSS, and JavaScript to create our digital clock.
HTML Code
We must first construct a simple HTML file in order to begin it named as index.html. We will include our clock’s primary structure in this file. Simply put the codes listed below into your file after it has been created. To ensure that your HTML page is seen correctly in a web browser, save it with the .html extension.
<!DOCTYPE html>
<html lang="en">
  <head>
    <title>Digital Clock</title>
    <meta charset="UTF-8" />
    <title>Digital Clock | Coding Jasim</title>
    <meta name="viewport" content="width=device-width" />
    <link rel='stylesheet' href='https://fonts.googleapis.com/css?family=Orbitron'>
    <link rel='stylesheet' href='https://fonts.googleapis.com/css?family=Aldrich'>
    <link rel="stylesheet" href="styles.css" />
  </head>
  <body>
    <div id="ClkDisplay" class="clock" onload="showTime()"></div>
    <script src="script.js"></script>
  </body>
</html>
CSS Code
After establishing the fundamental HTML layout of the clock, the following step is to incorporate styling for the clock using CSS.
Subsequently, we will generate our CSS file. Within this file, we will apply some essential CSS rules to design our clock. This will improve the display of our clock. Make a CSS file called style.css, then insert the provided codes into it. Keep in mid that a file with the .css extension needs to be created.
body {
  background: rgb(47, 44, 44);
}

.clock {
  position: absolute;
  top: 50%;
  left: 50%;
  transform: translateX(-50%) translateY(-50%);
  color: #46ff25;
  font-size: 60px;
  font-family: 'Orbitron', Verdana;
  letter-spacing: 7px;
}
JavaScript Code
After establishing the fundamental HTML In order for the scripts to run on the page, create a JavaScript file called script.js, put the provided codes into it, and ensure that is correctly connected to to your HTML document. Keep in mind that you must create a file with the .js extension.
function viewTime(){
  var date = new Date();
  var h = date.getHours(); // 0 - 23
  var m = date.getMinutes(); // 0 - 59
  var s = date.getSeconds(); // 0 - 59
  var session = "AM";

  if(h == 0){
      h = 12;
  }

  if(h > 12){
      h = h - 12;
      session = "PM";
  }

  h = (h < 10) ? "0" + h : h;
  m = (m < 10) ? "0" + m : m;
  s = (s < 10) ? "0" + s : s;

  var time = h + ":" + m + ":" + s + " " + session;
  document.getElementById("ClkDisplay").innerText = time;
  document.getElementById("ClkDisplay").textContent = time;

  setTimeout(viewTime, 1000);
}

viewTime();
In this guide, we explored the crucial steps needed to construct a digital clock. We began by establishing the HTML framework, producing the required elements and assign IDs for straightforward identification. Next, we applied CSS styles to improves the clock’s visual presentation and ensure it integrates smoothly into your web design. Finally, we introduced JavaScript functionality to refresh the time in real-time.
Keep in mind that learning we development requires practice. Try adding more features to your clock, experimenting with other styles, or even integrating it into a bigger project. Your ability to use these techs to produce engaging and intuitive online experiences will improve with practice and exploration.
We really hope you found this article entertaining, educational, and useful. With HTML, CSS, and JavaScript, you can accomplish much more than digital clock. Continue learning, keep exploring, and keep creating incredible things on the web.
Furthermore, on this site, you can discover how to create a digital clock within a circular layout, featuring choices for business websites, personal portfolios, and more. These templates utilize HTML, CSS, and JavaScript. It’s a great opportunity for you to explore and try recreating them, allowing you to enhance your web development skills even further.

