

How Create a Toggle Switch for Recording with HTML, CSS and JavaScript
Discover how easily construct a recording toggle button using HTML, CSS, and JavaScript. Create a responsive and easy-to-use toggle switch for your online projects.
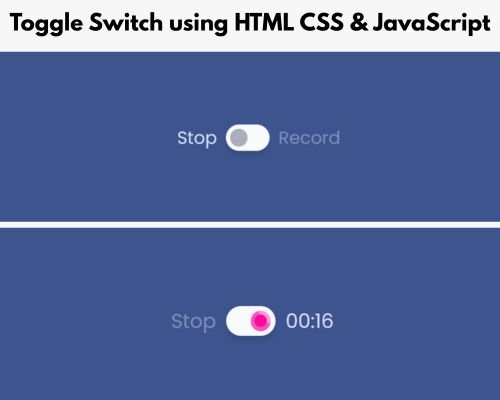
This tutorial will show you how to use HTML, CSS, and JavaScript to create a recording toggle switch button. Users may switch between two states, such as start and stop recording. This kind of button is helpful for websites that have voice or video recording capabilities. To make sure that both beginners and experienced coders can easily comprehend this, we will employ basic coding principles.
Requirements
Before getting started, ensure you have the following:
- Fundamental knowledge of HTML and CSS – You should be familiar with how to organize a website and apply styles to elements.
- Basic understanding of JavaScript – You need to grasp how functions, events, and DOM manipulation operate.
- Code Editor – You may use any coding tool such as VS code, Sublime Text, or Notepad++.
- Web Browser – Google Chrome or Mozilla Firefox to check your code.
- Step 1 : HTML CODE
First, we must create a basic HTML document named as index.html. In this document, we will define the core framework for the Toggle switch. Remember to save your HTML document with a .html extension to ensure it displays correctly in a web browser.
<!DOCTYPE html>
<html lang="en">
<head>
  <meta charset="UTF-8">
  <meta name="viewport" content="width=device-width, initial-scale=1.0">
  <title>Toggle Switch for Recording | Coding Jasim </title>
  <script src="https://kit.fontawesome.com/a076d05399.js"></script>
  <link rel="stylesheet" href="styles.css">
</head>
<body>
  <button id="recorder" class="recorder" type="button" aria-pressed="false">
    <span class="label-start__recorder" aria-hidden="true">Stop</span>
    <span class="switch__recorder">
      <span class="recorder__switch-handle">
        <svg class="timer__recorder" viewBox="0 0 16 16" width="16px" height="16px" aria-hidden="true">
          <g fill="none" stroke-linecap="round" stroke-width="0" transform="rotate(-90,8,8)">
            <circle class="recorder__timer-ring" stroke="hsla(0,0%,100%,0.3)" cx="8" cy="8" r="8"></circle>
            <circle class="recorder__timer-ring" id="timer-ring" stroke="hsla(0,0%,100%,0.4)" cx="8" cy="8" r="8"></circle>
          </g>
        </svg>
      </span>
    </span>
    <span class="recorder__label-end" aria-hidden="true">
      <span class="recorder__label-end-text">Record</span>
      <span class="recorder__label-end-text" id="time">00:00</span>
    </span>
  </button>
  <script src="script.js"></script>
</body>
</html>- Step 2 : CSS CODE
Afterward we will move on to creating our CSS file. This CSS stylesheet will handle the styling and arrangement of elements for toggle switch. In this file, we will utilize basic CSS concepts to design toggle button with label.
It is recommended to establish a CSS file, naming it style.css, and insert the provided codes into this file. Be sure that file has the .css extension.
@import url('https://fonts.googleapis.com/css?family=Poppins:400,500,600,700&display=swap');
* {
  border: 0;
  box-sizing: border-box;
  margin: 0;
  padding: 0;
}

:root {
  --hue: 223;
  --red: hsl(323, 98%, 51%);
  --white: hsl(210, 17%, 98%);
  --primary: hsl(var(--hue),90%,50%);
  --primary-t: hsla(var(--hue),90%,50%,0);
  --gray1: hsl(var(--hue),40%,40%);
  --gray3: hsl(var(--hue),10%,70%);
  --gray9: hsl(var(--hue),70%,90%);
  --trans-dur: 0.3s;
  --trans-timing: cubic-bezier(0.65,0,0.35,1);
  font-size: calc(28px + (60 - 28) * (100vw - 320px) / (3840 - 320));
}

body,
button {
  color: var(--gray9);
  font: 1em/1.5'Poppins', sans-serif;
  transition: background-color var(--trans-dur), color var(--trans-dur);
}

body {
  background-color: var(--gray1);
}

.recorder {
  background-color: transparent;
  cursor: pointer;
  display: flex;
  align-items: center;
  margin: auto;
  outline: transparent;
  position: absolute;
  top: 50%;
  left: 50%;
  transform: translate(-50%, -50%);
  -webkit-appearance: none;
  appearance: none;
  -webkit-tap-highlight-color: transparent;
}
.label-start__recorder, .recorder__label-end {
  display: block;
  position: relative;
}
.label-start__recorder, .recorder__label-end-text {
  transition: opacity var(--trans-dur);
}
.label-start__recorder {
  margin-inline: 0 0.5em;
}
.recorder__label-end {
  margin-inline: 0.5em 0;
}
.recorder__label-end-text {
  opacity: 0.4;
}
.recorder__label-end-text + .recorder__label-end-text {
  opacity: 0;
  position: absolute;
  top: 0;
  left: 0;
}
[dir=rtl] .recorder__label-end-text + .recorder__label-end-text {
  right: 0;
  left: auto;
}
.switch__recorder {
  background-color: var(--white);
  border-radius: 0.75em;
  box-shadow: 0 0 0 0.125em var(--primary-t), 0 0.25em 0.25em rgba(0, 0, 0, 0.1);
  display: flex;
  padding: 0.25em;
  width: 2.5em;
  height: 1.5em;
}
.switch__recorder, .recorder__switch-handle {
  transition: background-color var(--trans-dur), box-shadow var(--trans-dur), transform var(--trans-dur) var(--trans-timing), transform-origin var(--trans-dur) var(--trans-timing);
}
.recorder__switch-handle {
  background-color: var(--gray3);
  border-radius: 50%;
  display: block;
  transform-origin: 0 0.5em;
  width: 1em;
  height: 1em;
}
[dir=rtl] .recorder__switch-handle {
  transform-origin: 100% 0.5em;
}
.timer__recorder {
  display: block;
  overflow: visible;
  width: 100%;
  height: auto;
}
.recorder__timer-ring {
  transition: r var(--trans-dur) var(--trans-timing), stroke-dasharray var(--trans-dur) var(--trans-timing), stroke-dashoffset var(--trans-dur) var(--trans-timing), stroke-width var(--trans-dur) var(--trans-timing);
}
.recorder:focus-visible .switch__recorder {
  box-shadow: 0 0 0 0.125em var(--primary), 0 0.25em 0.25em rgba(0, 0, 0, 0.1);
}
.recorder:active .recorder__switch-handle {
  transform: scaleX(1.5);
}
.recorder[aria-pressed=true] .label-start__recorder {
  opacity: 0.4;
}
.recorder[aria-pressed=true] .recorder__label-end-text {
  opacity: 0;
}
.recorder[aria-pressed=true] .recorder__label-end-text + .recorder__label-end-text {
  opacity: 1;
}
.recorder[aria-pressed=true] .recorder__switch-handle {
  background-color: var(--red);
  transform: translateX(100%);
  transform-origin: 100% 0.5em;
}
[dir=rtl] .recorder[aria-pressed=true] .recorder__switch-handle {
  transform: translateX(-100%);
  transform-origin: 0 0.5em;
}
.recorder[aria-pressed=true] .recorder__timer-ring {
  r: 6.5px;
  stroke-width: 3px;
}
.recorder[aria-pressed=true]:active .recorder__switch-handle {
  transform: translateX(100%) scaleX(1.5);
}
[dir=rtl] .recorder[aria-pressed=true]:active .recorder__switch-handle {
  transform: translateX(-100%) scaleX(1.5);
}- Step 3 : JAVASCRIPT
Then lastly, we will add interactive features to our button with JavaScript. We’ll modify the button’s state and it’s visual look depending on whether it is in a recording mode or not. So, let’s create our JavaScript file called script.js, then insert the provided codes into it.
document.addEventListener('DOMContentLoaded', function () {
  const recorderBtn = document.getElementById('recorder');
  const displayTime = document.getElementById('time');
  const ringTimer = document.getElementById('timer-ring');
  const maxTime = 60;
  let recording = false;
  let time = 0;
  let stoppedTime = 0;
  let intervalId;

  function updateDisplayTimer() {
    const minutes = `0${Math.floor(time / 60)}`.slice(-2);
    const seconds = `0${time % 60}`.slice(-2);
    displayTime.textContent = `${minutes}:${seconds}`;
  }

  function updateProgress() {
    const circumference = recording ? 40.84 : 50.27;
    const circumferencePart = recording ? 1 - (time / maxTime) : 1;
    const strokeDashArray = `${circumference} ${circumference}`;
    const strokeDashOffset = +(circumference * circumferencePart).toFixed(2);
    ringTimer.style.strokeDasharray = strokeDashArray;
    ringTimer.style.strokeDashoffset = strokeDashOffset;
  }

  function startRecording() {
    time = 0;
    stoppedTime = 0;
    updateDisplayTimer();
    updateProgress();
    intervalId = setInterval(() => {
      time++;
      stoppedTime++;
      updateDisplayTimer();
      updateProgress();
      if (time >= maxTime) {
        stopRecording();
      }
    }, 1000);
  }

  function stopRecording() {
    clearInterval(intervalId);
    updateProgress();
  }

  recorderBtn.addEventListener('click', function () {
    recording = !recording;
    recorderBtn.setAttribute('aria-pressed', recording);

    if (recording) {
      startRecording();
    } else {
      stopRecording();
    }
  });
});
Final Thoughts
You have effectively used HTML, CSS, and JavaScript to create a recording toggle button. This guide illustrate how to switch between two different state and incorporate animations into your button to enhance the user experience. You can further expand this project by integrating a timer or even audio recording capabilities. Whether you are creating a recording application for a website or simply advancing your web development skills, this toggle button serves as an excellent enhancement to your project.
Feel free to try out various styles and functionalities to make this recording toggle button even more engaging and practical. With just a handful of code, you’ve crafted a robust and responsive toggle switch that can be applied to numerous real-world applications.
By adhering to this comprehensive guide, you now possess a functional toggle button that can be utilized for recording or any similar purposes.